Windows XP SP3 or later versions of Windows 32-bit or 64-bit
Microsoft Excel
2003 SP3,
2007 SP2 or SP3
2010 SP1. 32-bit or 64-bit
2013 / 365 32-bit or 64-bit
Instructions for setting up the projects
Download the package SNWRH.exe or as received by you from your company and save the file to a folder of your choice.
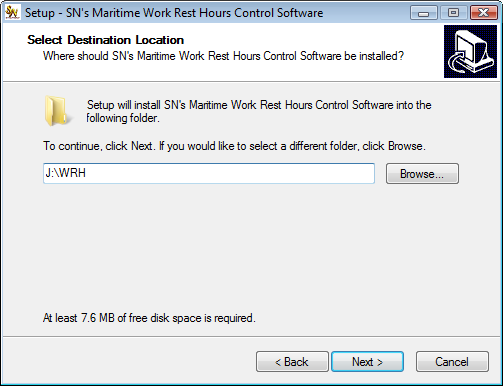
Install the package as you would with any other software. Select the drive from where you would like to run the application.
Example: C:\WRH or J:\WRH - The destination folder name must always be WRH
When using from a networked PC, map the server C: or D: drive to a single letter. Example J: or any other free letter.
Install this software on all PCs which have their own Windows and MS Office. That is, all PCs that are not thin clients. After installing the software in the local C:\WRH or D:\WRH from the setup file, delete the entire C:\WRH or D:\WRH folder in all the other PCs except the server PC. This step is necessary to register MSCOMCTL.ocx properly.

You may choose to install desktop shortcut icons as below -

Continue with the installation until the Finish button is displayed.
Multiple users may create shortcuts in their own working folders or desktops to the parent application and use the project at the same time. It is assumed that the multiple users would be from different departments and work with either their own or concerned crew data (so that one user does not overwrite on someone else's records).
The project when shipped has some arbitrary default data that can be used for testing purposes.
There are many ways to give clients a testing/trial run of the projects.
Examples
In the trial mode, we stop the printing. Also, only nine records are shown in the trial mode. The user makes a purchase and sends us the Product ID information. The product ID is shown when the user tries to preview or print. Example of product ID box
We need all of the Product ID to make a license file. Either copy it down carefully or simply click on the ‘Copy to Clipboard’ button. Then paste into an e-mail to us. You may also attach the product ID file which is generated and saved to the WRH folder.
We create a license file and send it back to the user.
The user saves this license file to ?:\WRH (where ? is the drive letter in which the main project is saved - The drive and folder is displayed in cell K10 in the Hours page )
To summarize
For getting upgrades -